

.vsix installation file rather than through the Marketplace, and you install it directly from the VS Code Extensions panel.
Requirements
Windows, macOS, and Linux are all supported. The installation file is identical across all operating systems.
Installing
1
Open the Extensions panel
In the VS Code activity bar on the left, click the Extensions icon.Shortcut:
Ctrl+Shift+X (macOS: Cmd+Shift+X)2
Choose Install from VSIX
Click the 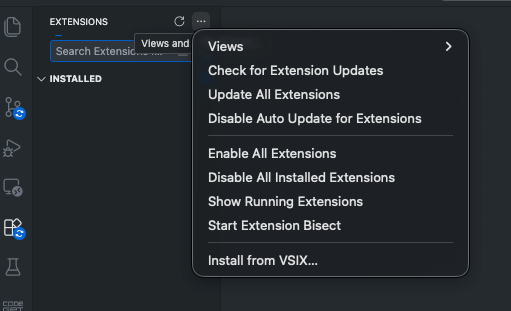
··· (More Actions) button at the top right of the Extensions panel, then select Install from VSIX… from the menu.3
Select the file
When the file browser opens, select the 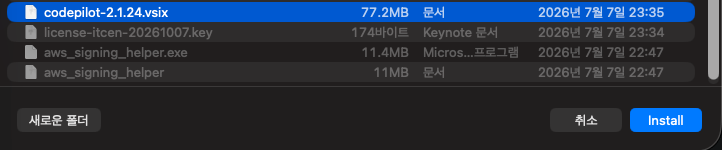
codepilot-<version>.vsix file you received.4
Restart VS Code
When installation finishes, a restart prompt appears in the bottom right. Click Restart Extensions or Restart.After restarting, the CodePilot icon is added to the activity bar.
Verifying the installation
Click the CodePilot icon in the activity bar to open the CodePilot panel. If you haven’t signed in yet, the sign-in screen appears instead of the chat. Seeing this screen means the installation finished successfully.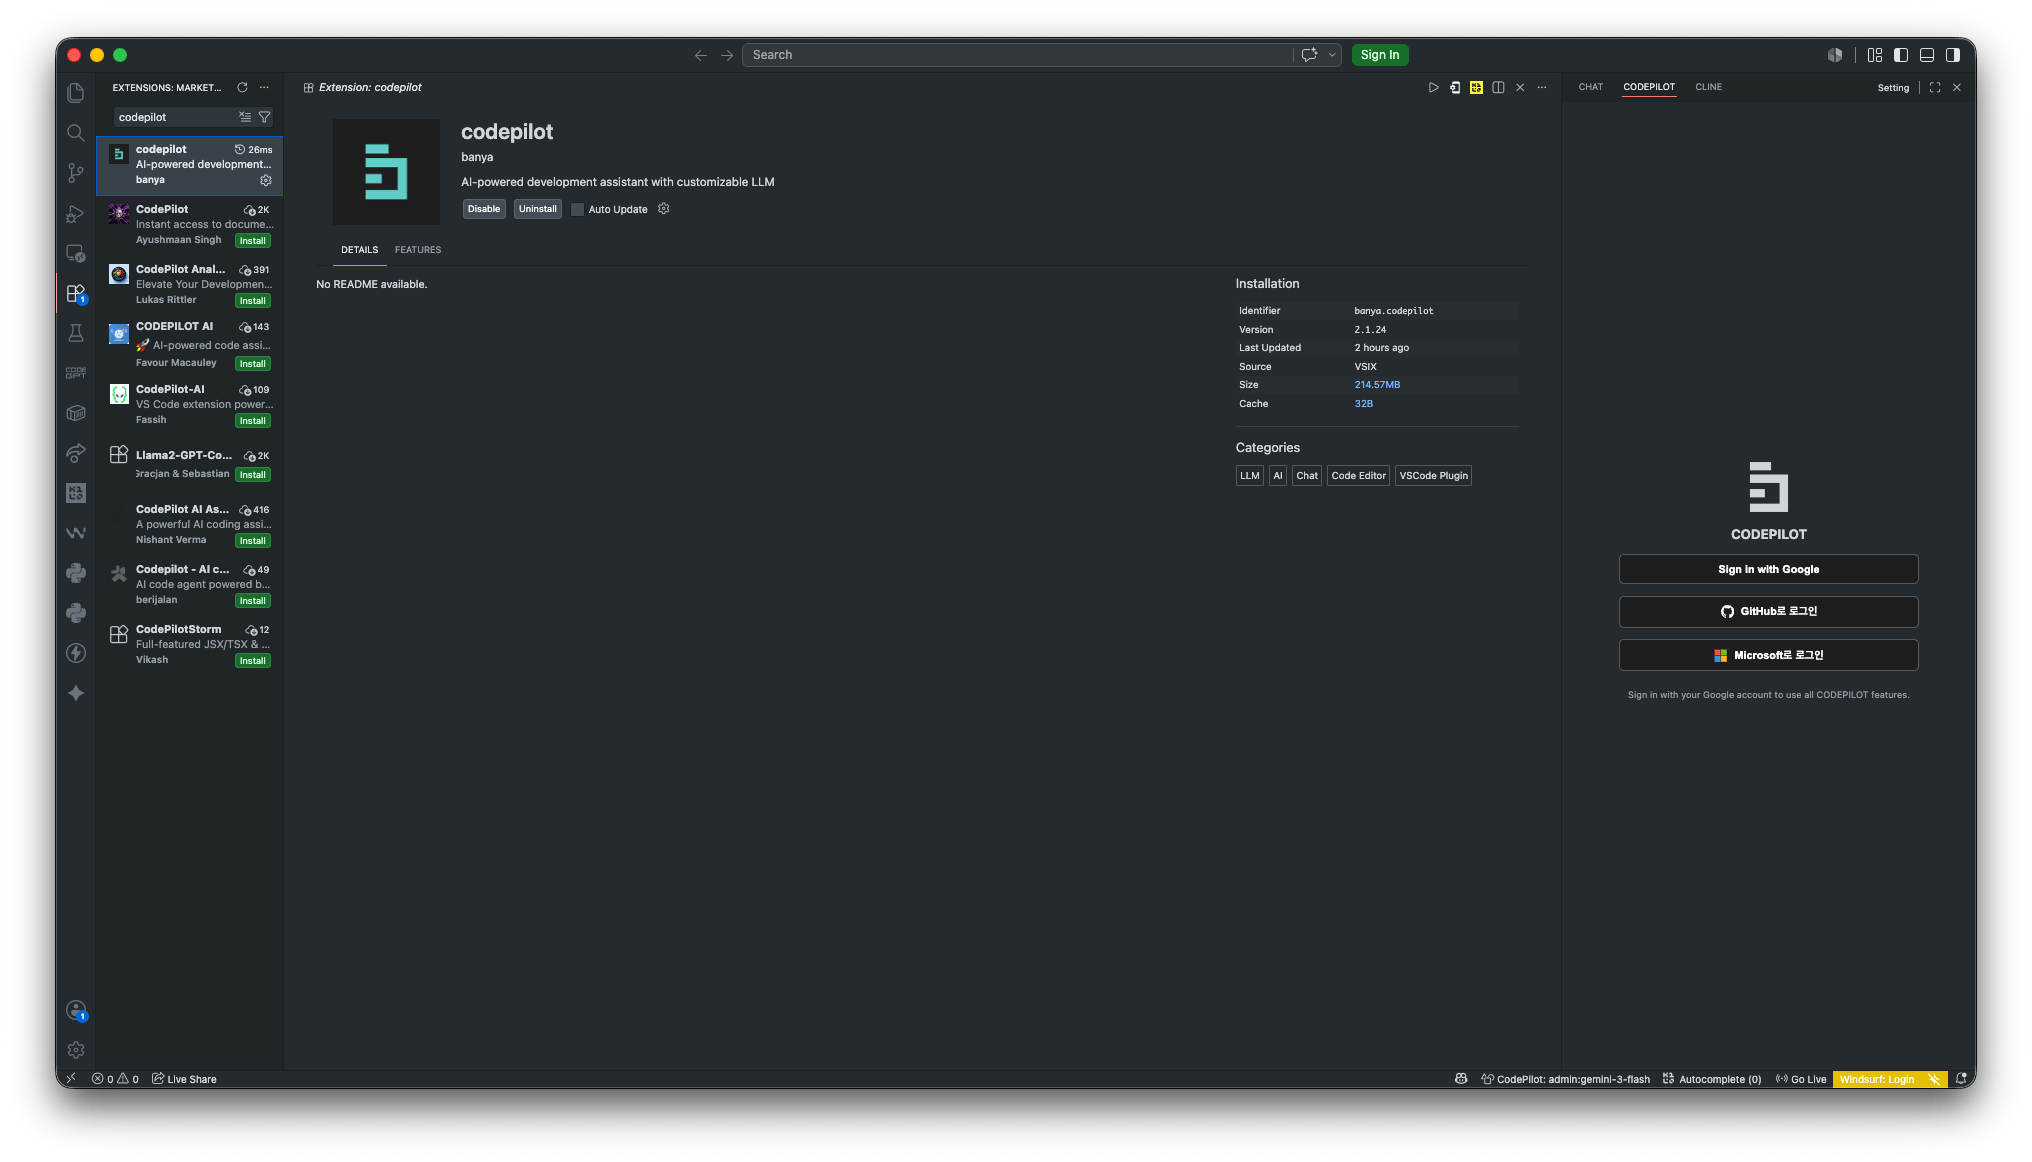
Updating
Get the new version’s.vsix file and install it again the same way to overwrite the existing version. Your settings and conversation history are preserved.
Next steps
Sign in
Sign in with your account and activate the IDE
Connect an AI model
Choose an AI model or register an API key